What is a Facebook Retargeting Pixel?
Have you ever wondered how after visiting a website, you start to see their ads appearing on Facebook and Instagram….. it’s not magic, it’s simply a Facebook Pixel that has been created in Facebook and the pixel code has been inserted into the code of the website. When a visitor comes to your website a browser cookie is sent, this then allows Facebook to retarget the visitor with your relevant ads.
The pixel allows you to test, refine and target as well as track your ads. The Facebook pixel is a data-gathering tool for both Facebook and Instagram.
If you have a website and you have Facebook and/or Instagram or plan to in the future then getting the Facebook pixel set up and installed is essential for your social media marketing.
What is meant by retargeting?
So once you have been somewhere and shown an interest in a product, perhaps you got to the checkout, and you didn’t get time to complete the purchase…. remarketing works by showing you that product on either Facebook or Instagram next time you go to your social media account. In many cases, they will also offer you a discount code with the advert as an extra incentive for you to complete the purchase.
The actions visitors take on your website are tracked by the pixel, these actions could be adding something to their basket, or making a complete purchase.. these actions are referred to by Facebook as events.
Adding Events to your Facebook pixel
But of course, it would be far too easy to just have to install that one piece of pixel code… you now have to teach Facebook what it is you want to happen.
Note: Many of the larger companies such as WordPress, Shopify etc.. have the main events already added to their pixels, so if you chose partner at the beginning of the pixel setup then you will not need to add the main events, you can however add more events if you want to narrow down your remarketing.
These actions are called events and there are many to choose from such as-
- Add to cart
- Add to wishlist
- ViewContent
- Purchase
The above are the most common, for a full list of events take a look at the following link (https://developers.facebook.com/docs/facebook-pixel/reference), of course, the more specific information you can give the better your remarketing will be.
You can add to the events which are called parameters these can help your retargeting further.
Note: iOS 14.5 updates will only allow 8 standard events on your Facebook Pixel, for this reason, it would be worth setting up an API also.
So now we know The What, and The Why, Let’s do The How
Go to your Facebook Business Page.
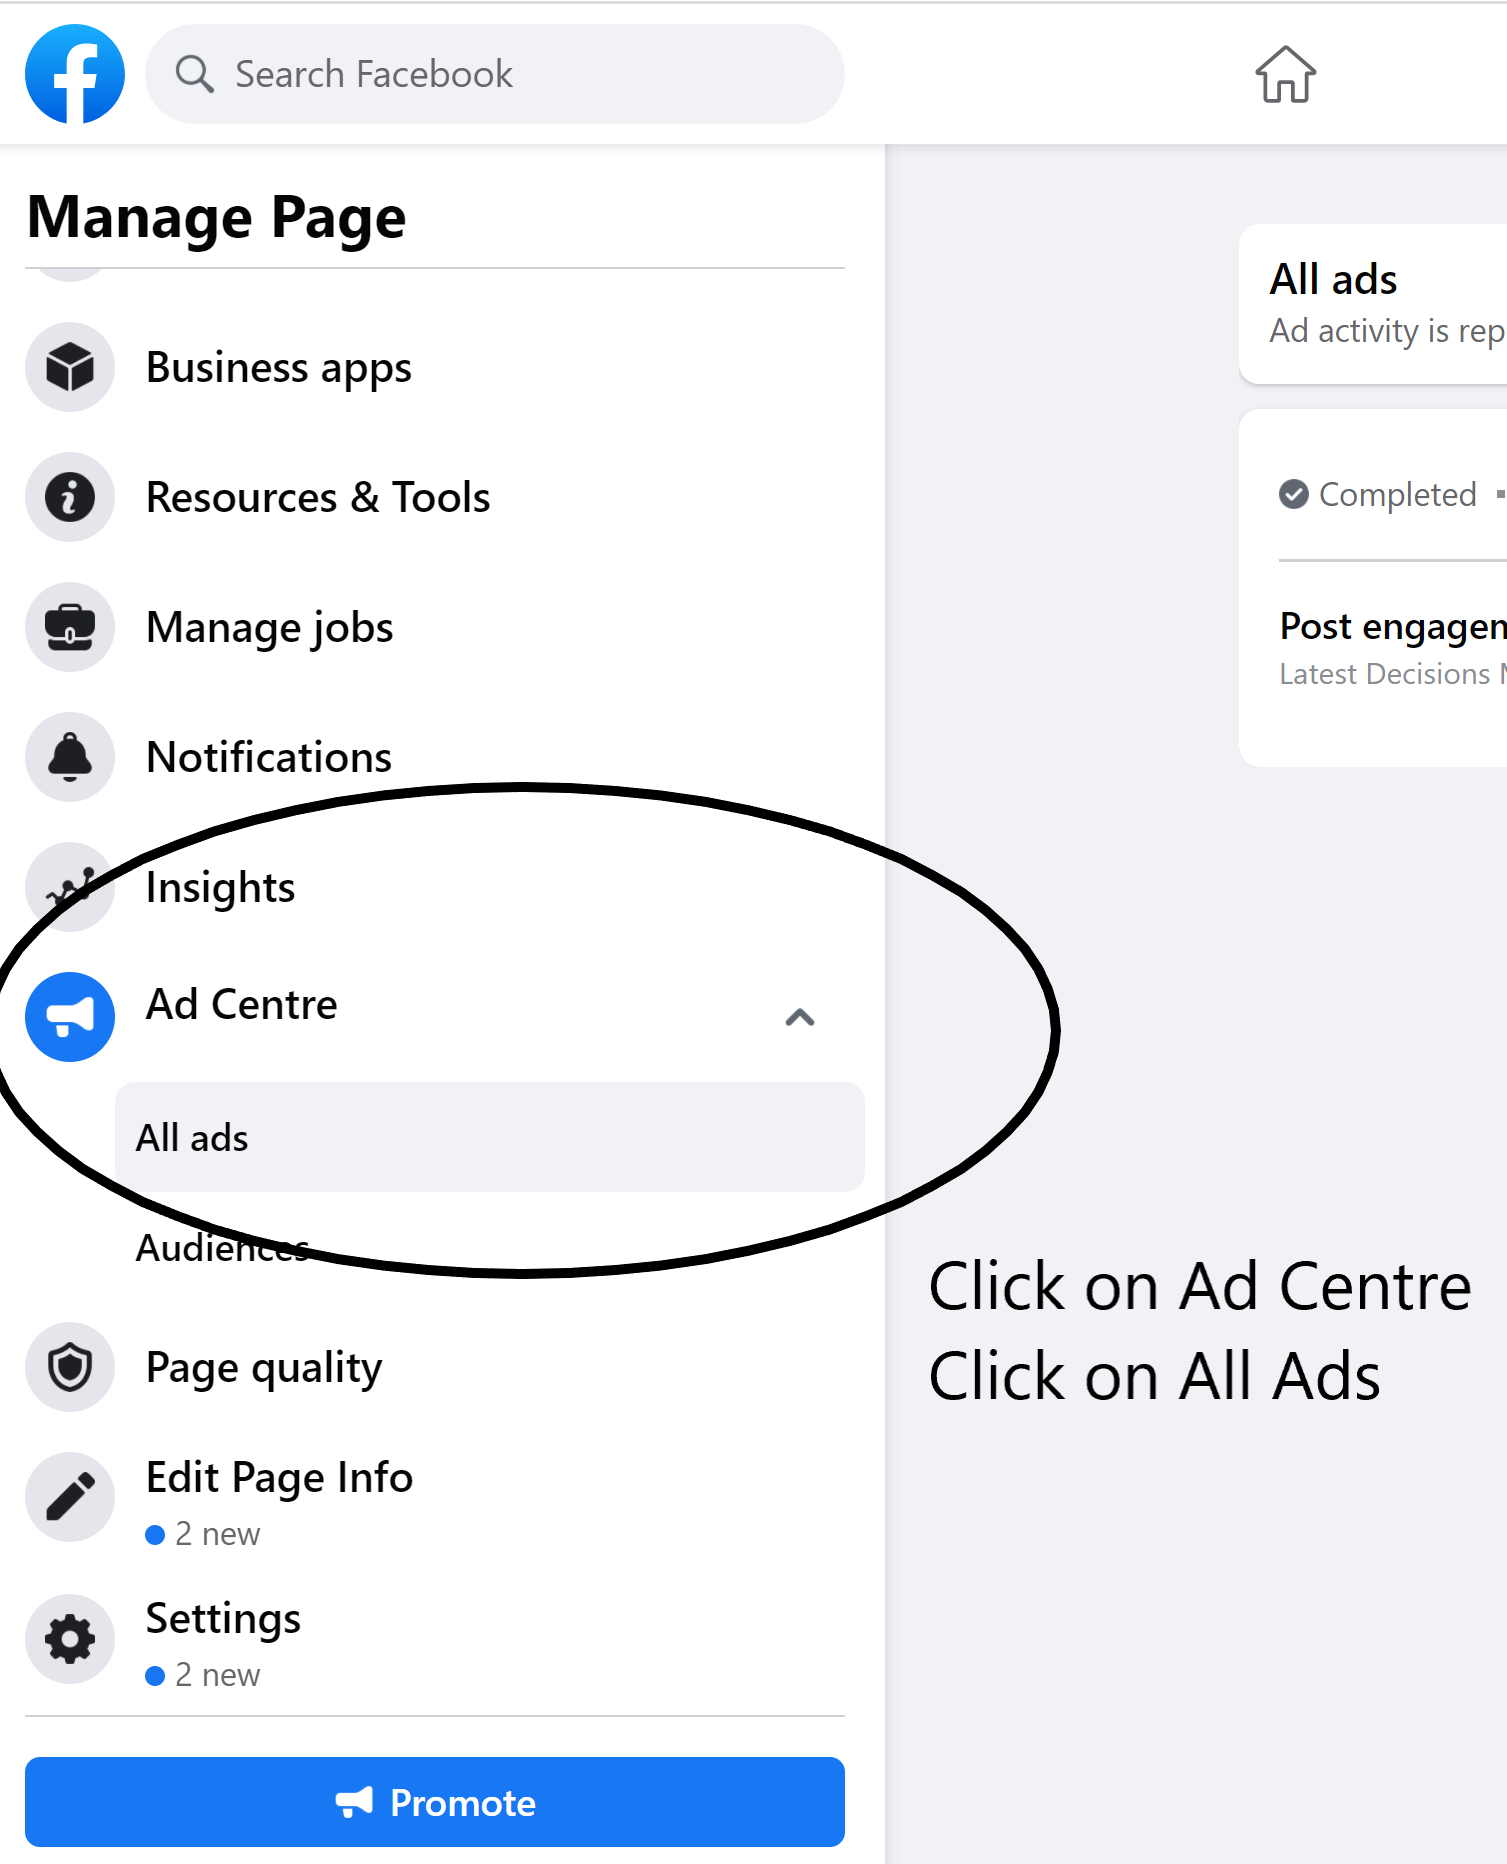
On the left-hand side, you will find a menu.
Click on Ad Centre.
Click on All Ads.
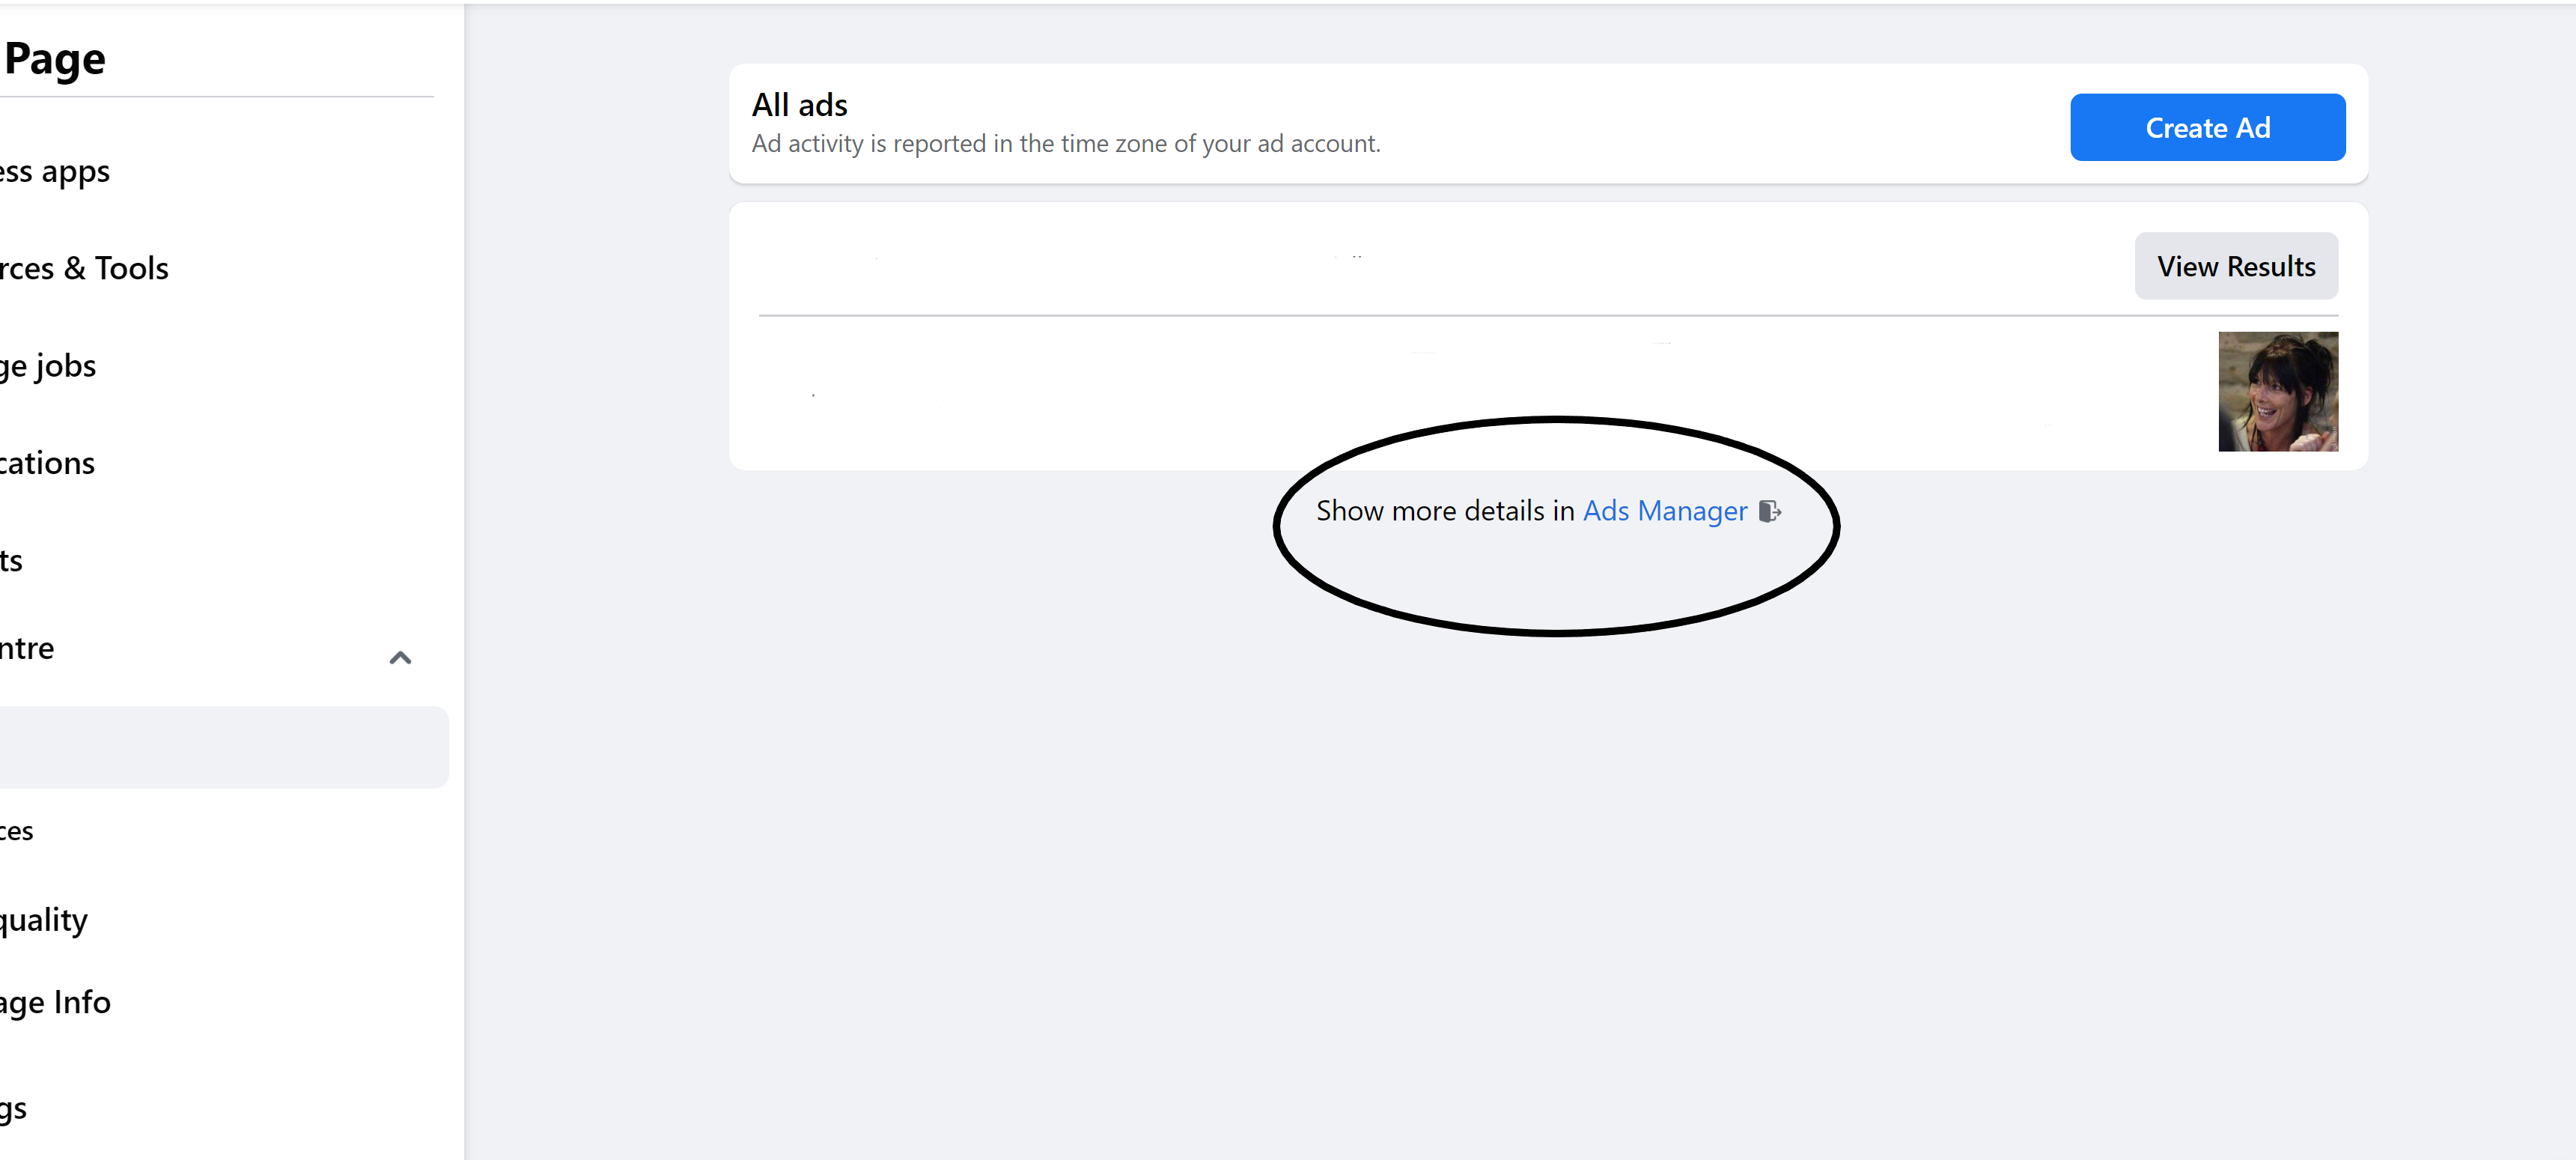
In the main window on the right, you will see the words ‘Show more details in Ads Manager’ Ads manager is in blue and is a link.
Click on the link to take you to Ads Manager.
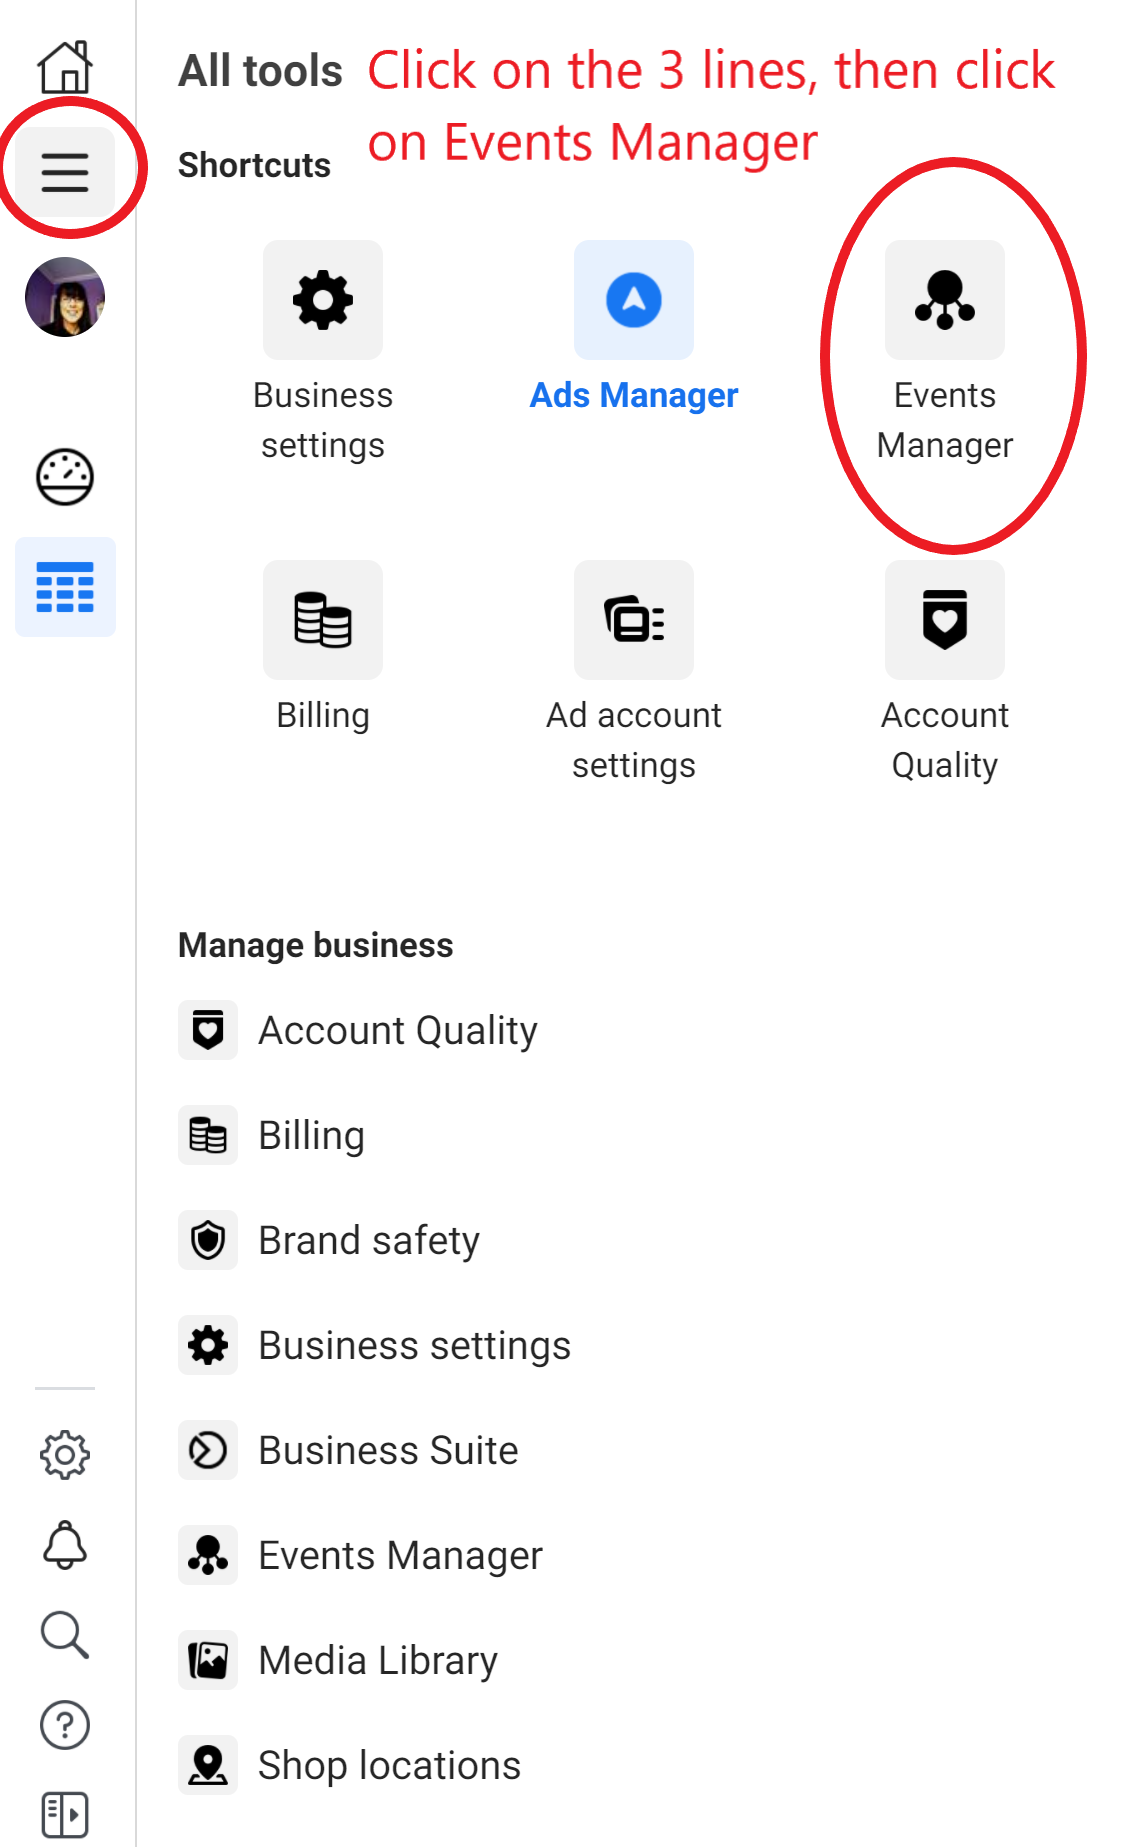
Click on the menu on the left-hand side to open all tools.
Click on Events Manager
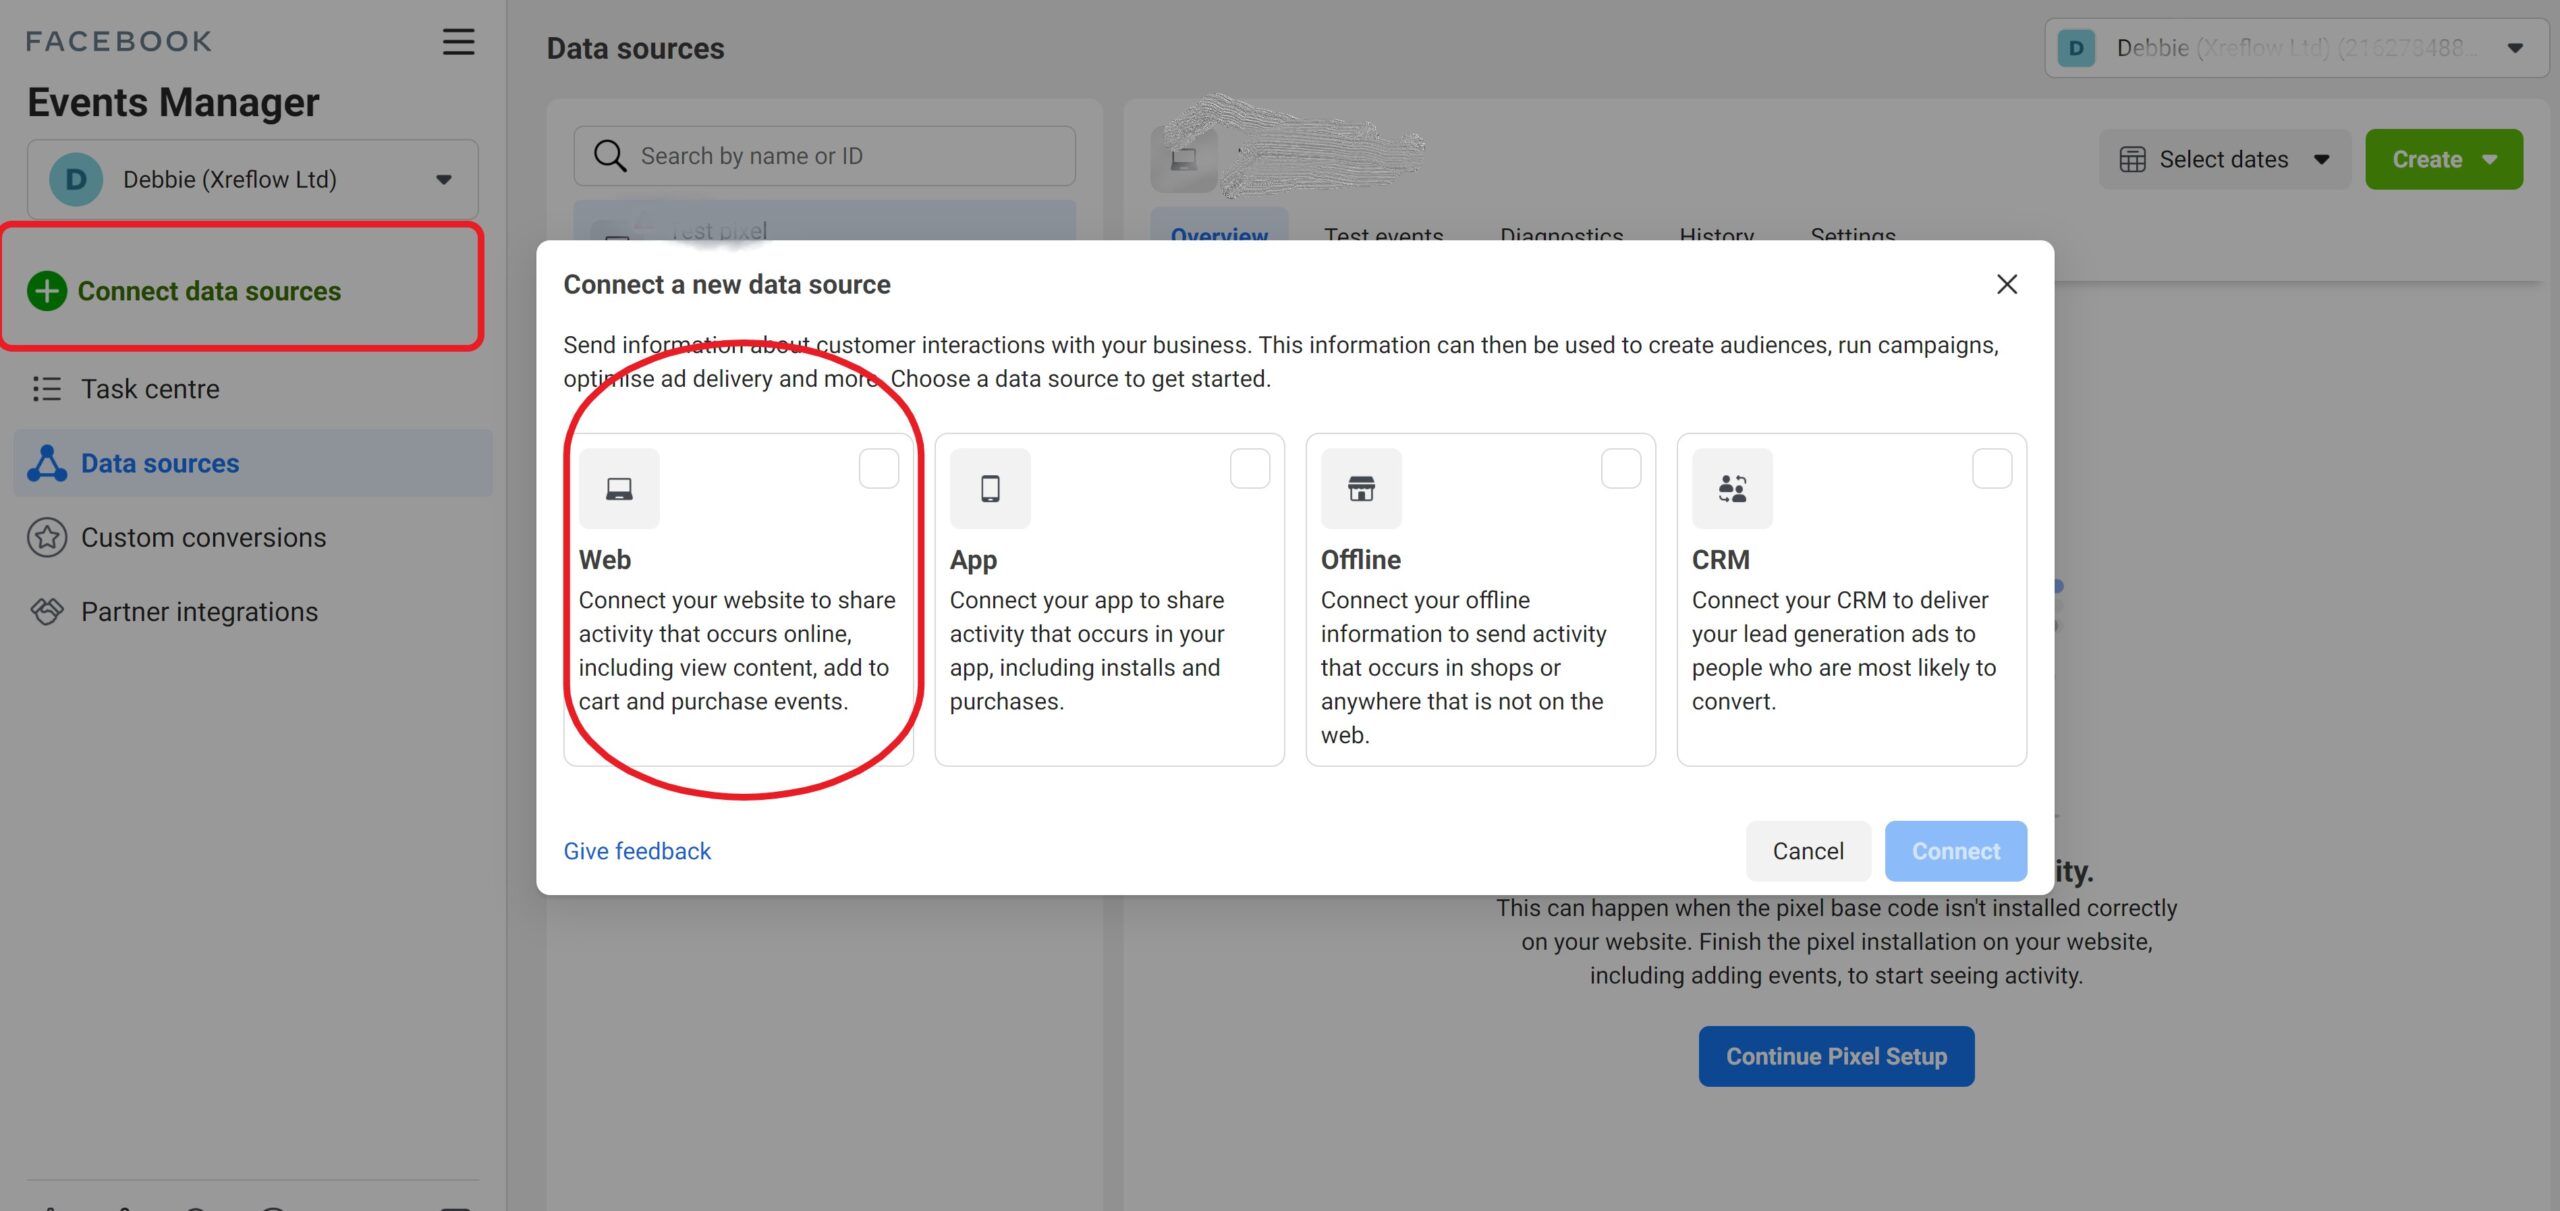
On the left-hand side, you will see a menu.
Click on the words Connect data Sources.
A window will pop up, for this particular exercise we are looking to create a pixel for placing on your website, so choose Web.
Click connect
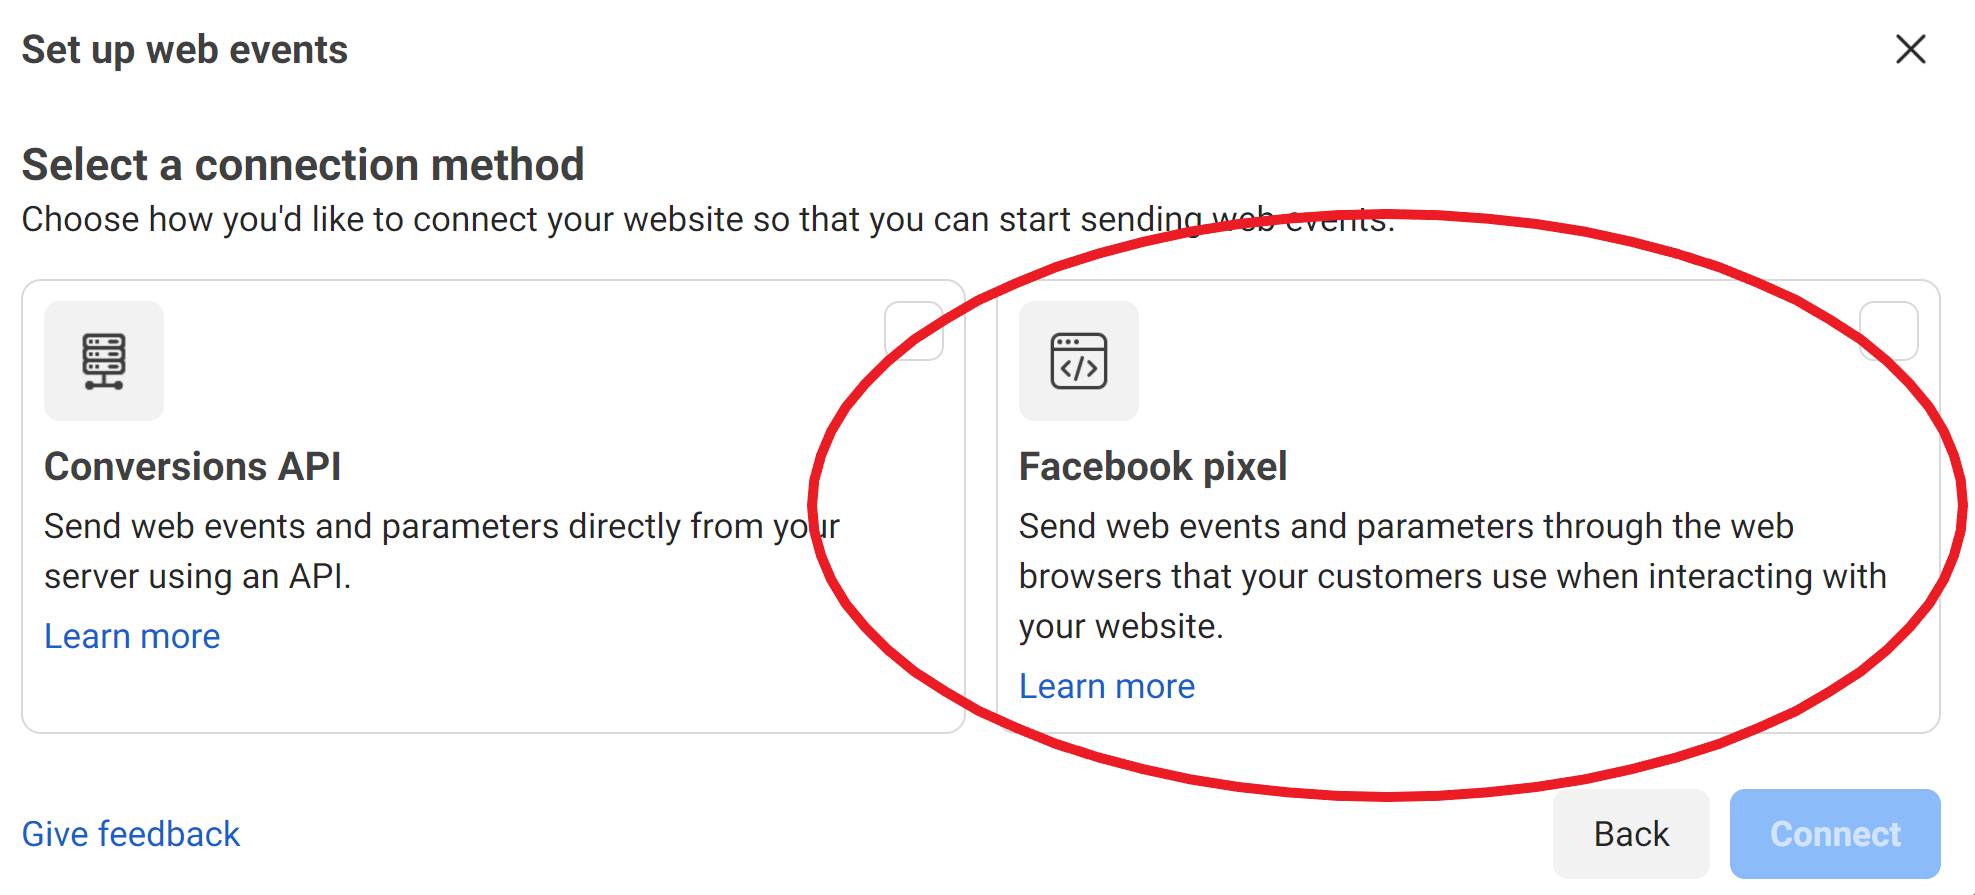
Next, choose Facebook pixel.
Click connect.
A window will appear explaining what a pixel does, once you have read this..
Click on continue.
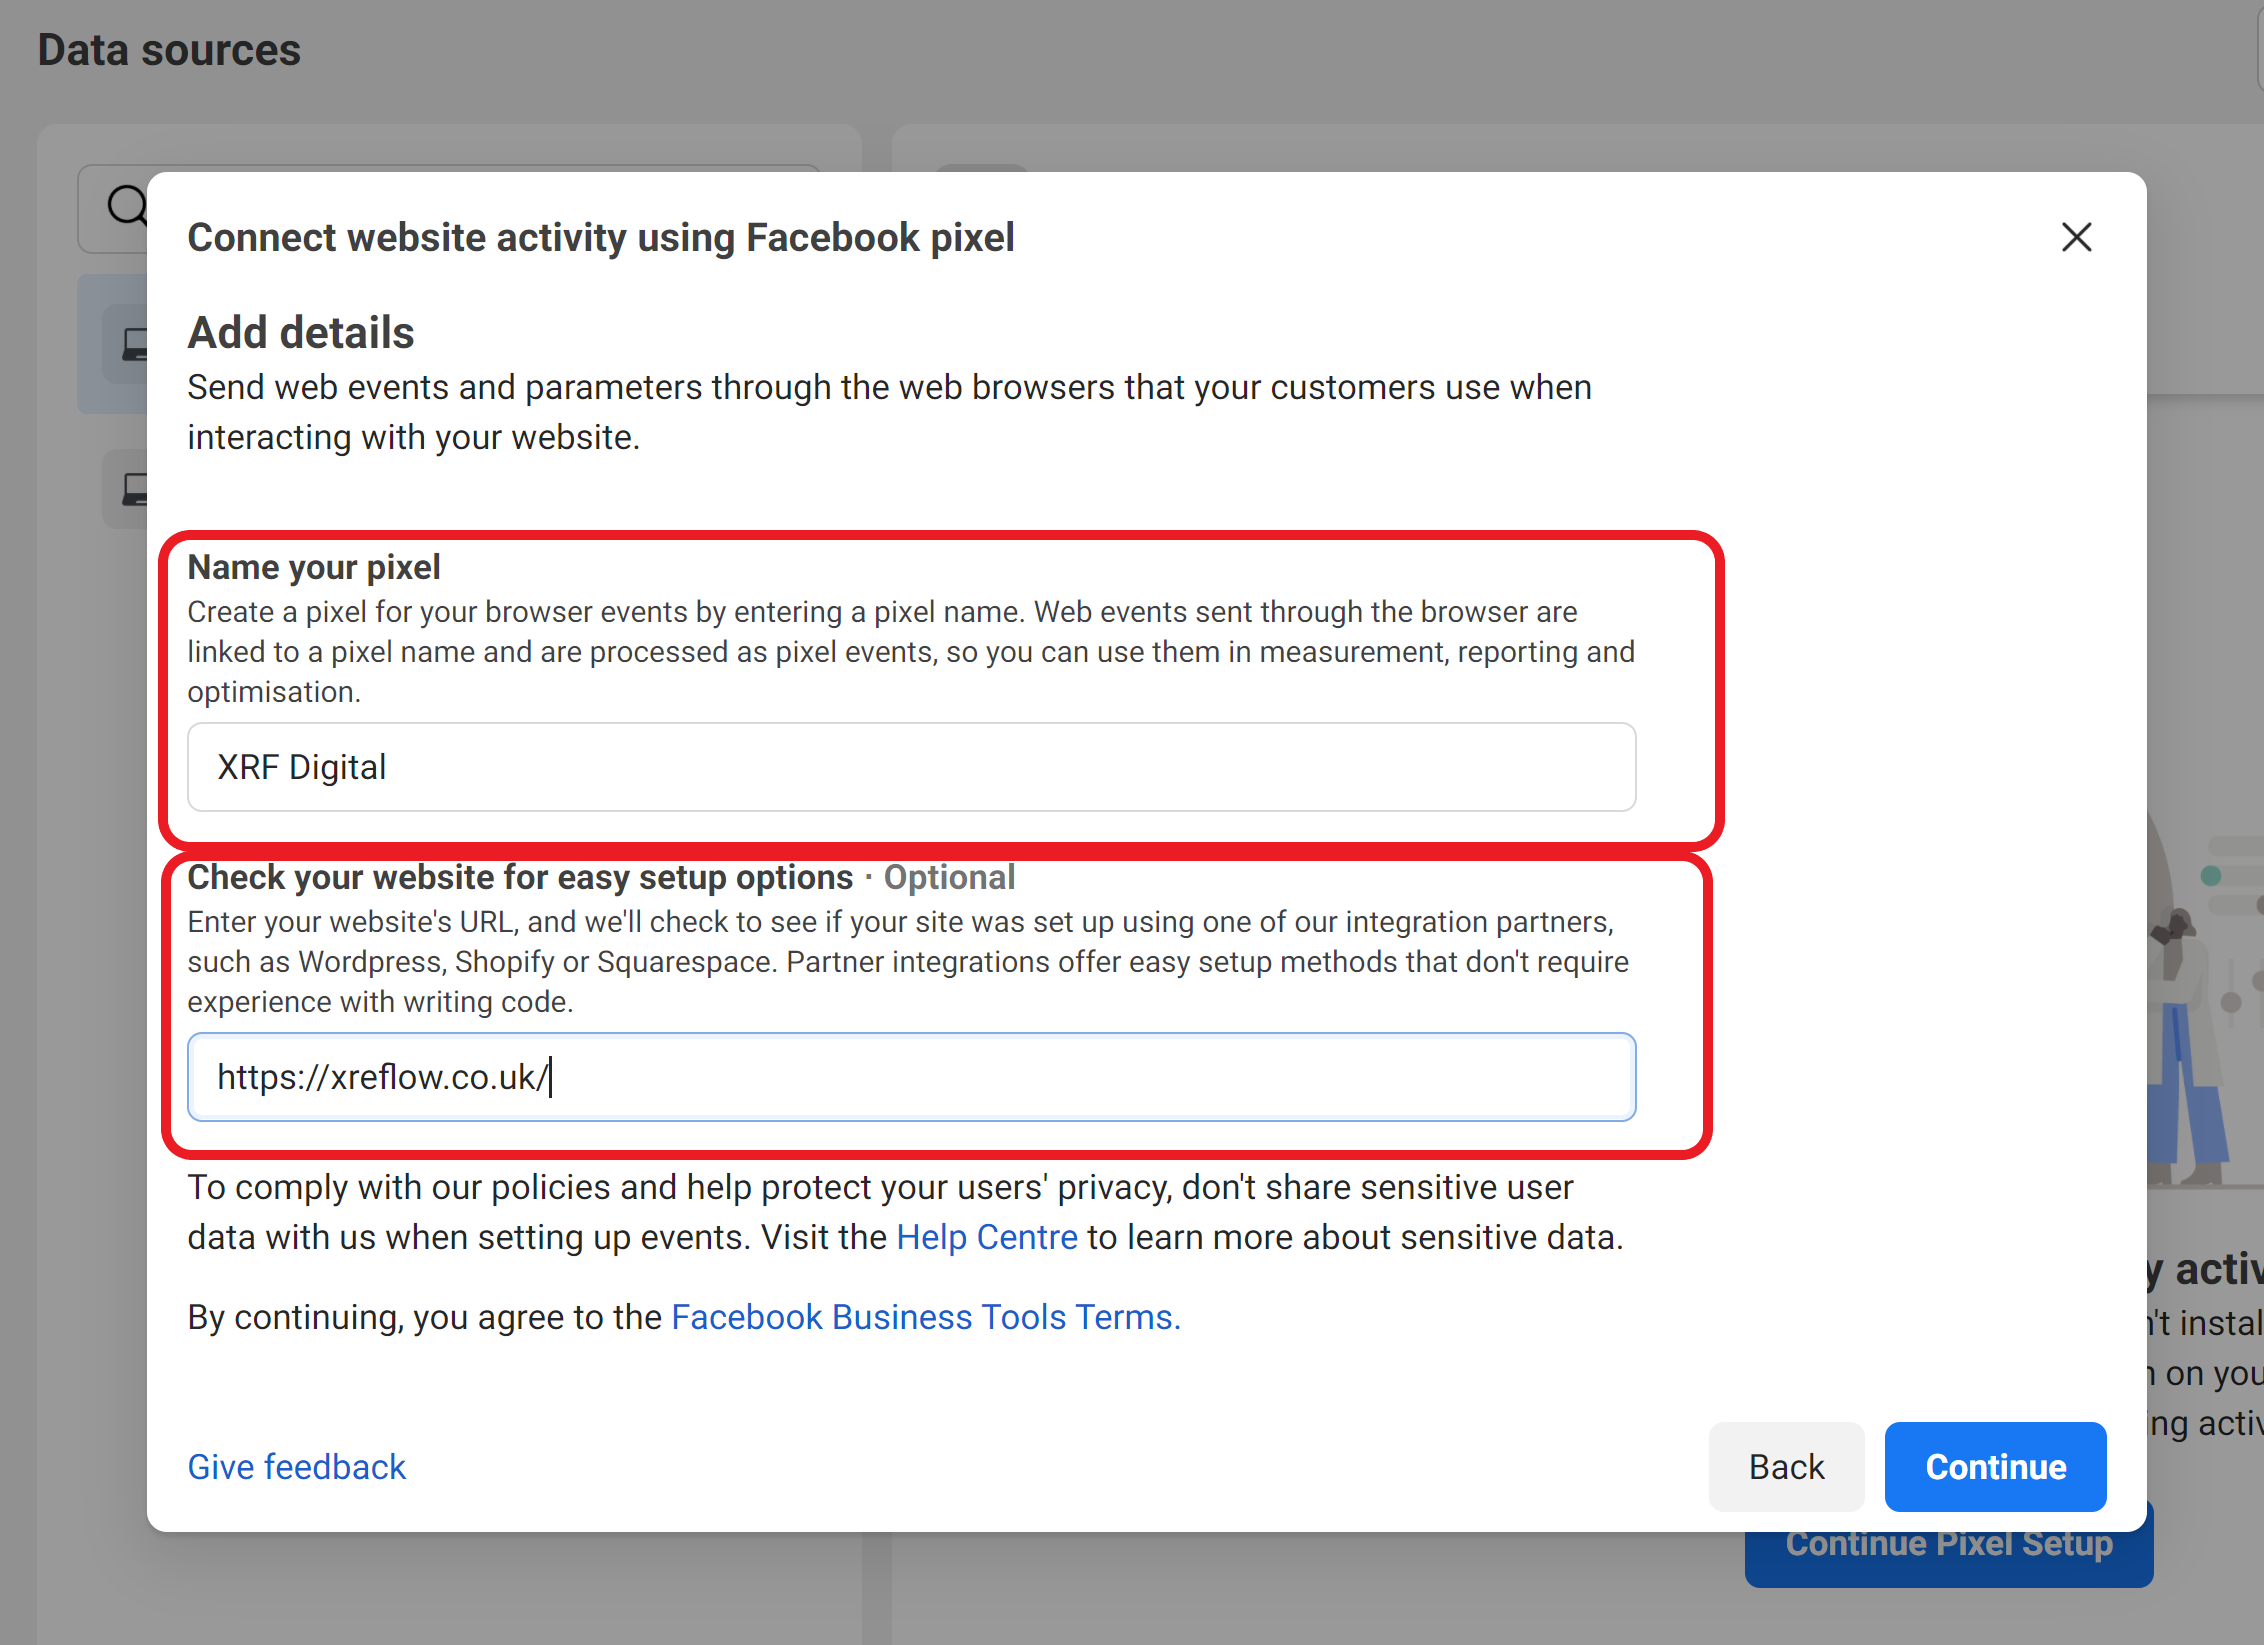
Name your Pixel
Put in your website URL.
Note: In Events Manager, you get one pixel for each ad account. The name should tie to your business rather than an advertising campaign you are planning to run.
Note: In Facebook Business Manager you can set up more than one pixel per ad account
How to insert the Facebook pixel code on your website.
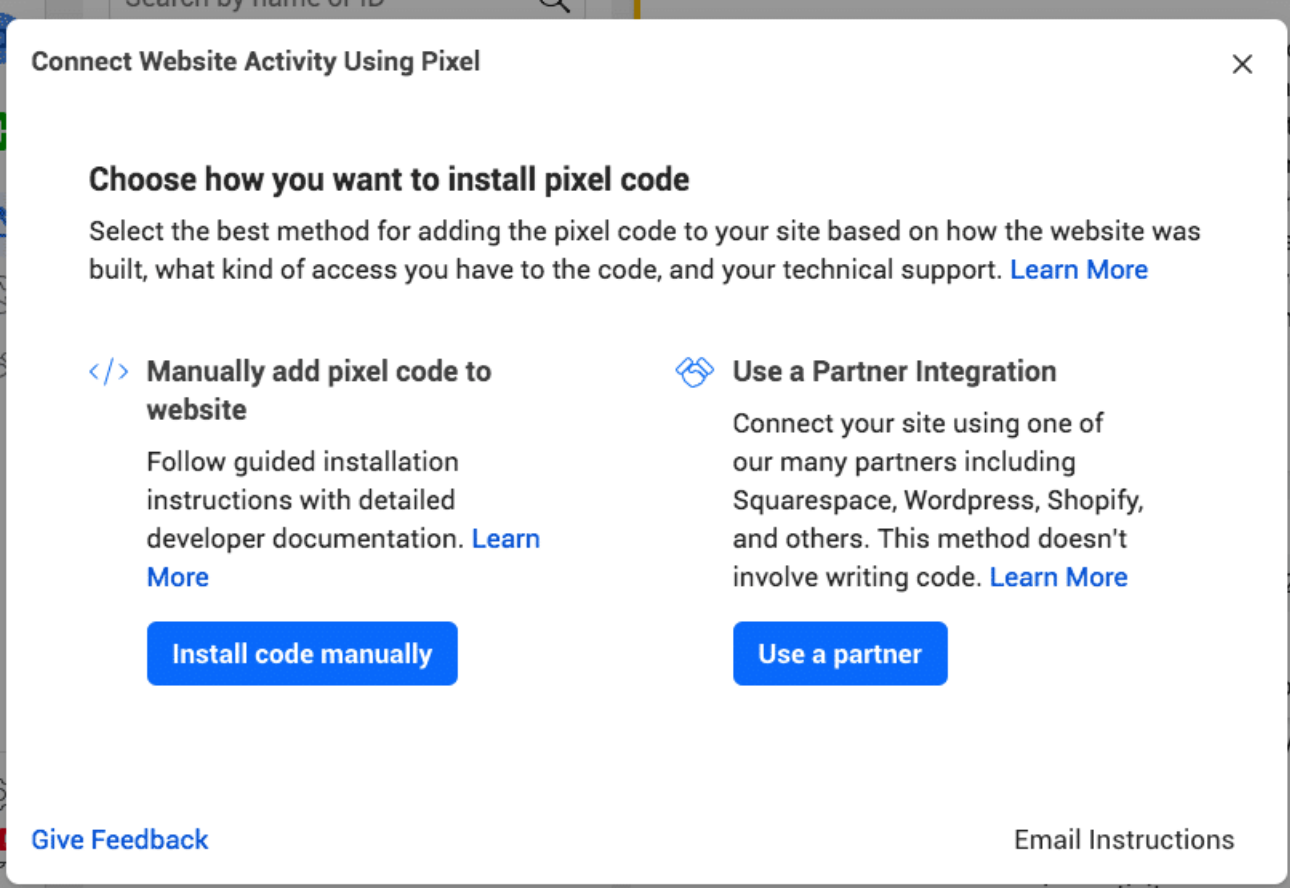
There are a couple of ways of doing this, if you choose partners and your website is with a large company they should be listed, such as WordPress or Shopify for example, putting the code in this way is pretty straight forward simply follow the steps. Another good thing about doing it this way is many of the companies have already added events to the code so you do not have to.
If however your partner company is listed you will need to install it manually…. if your website was created by a website company such as XRF Digital, we will be able to put the pixel in for you, simply click on email instructions and send it directly to your website developer…
otherwise, this is what you need to do…
Click on the blue button install Code Manually
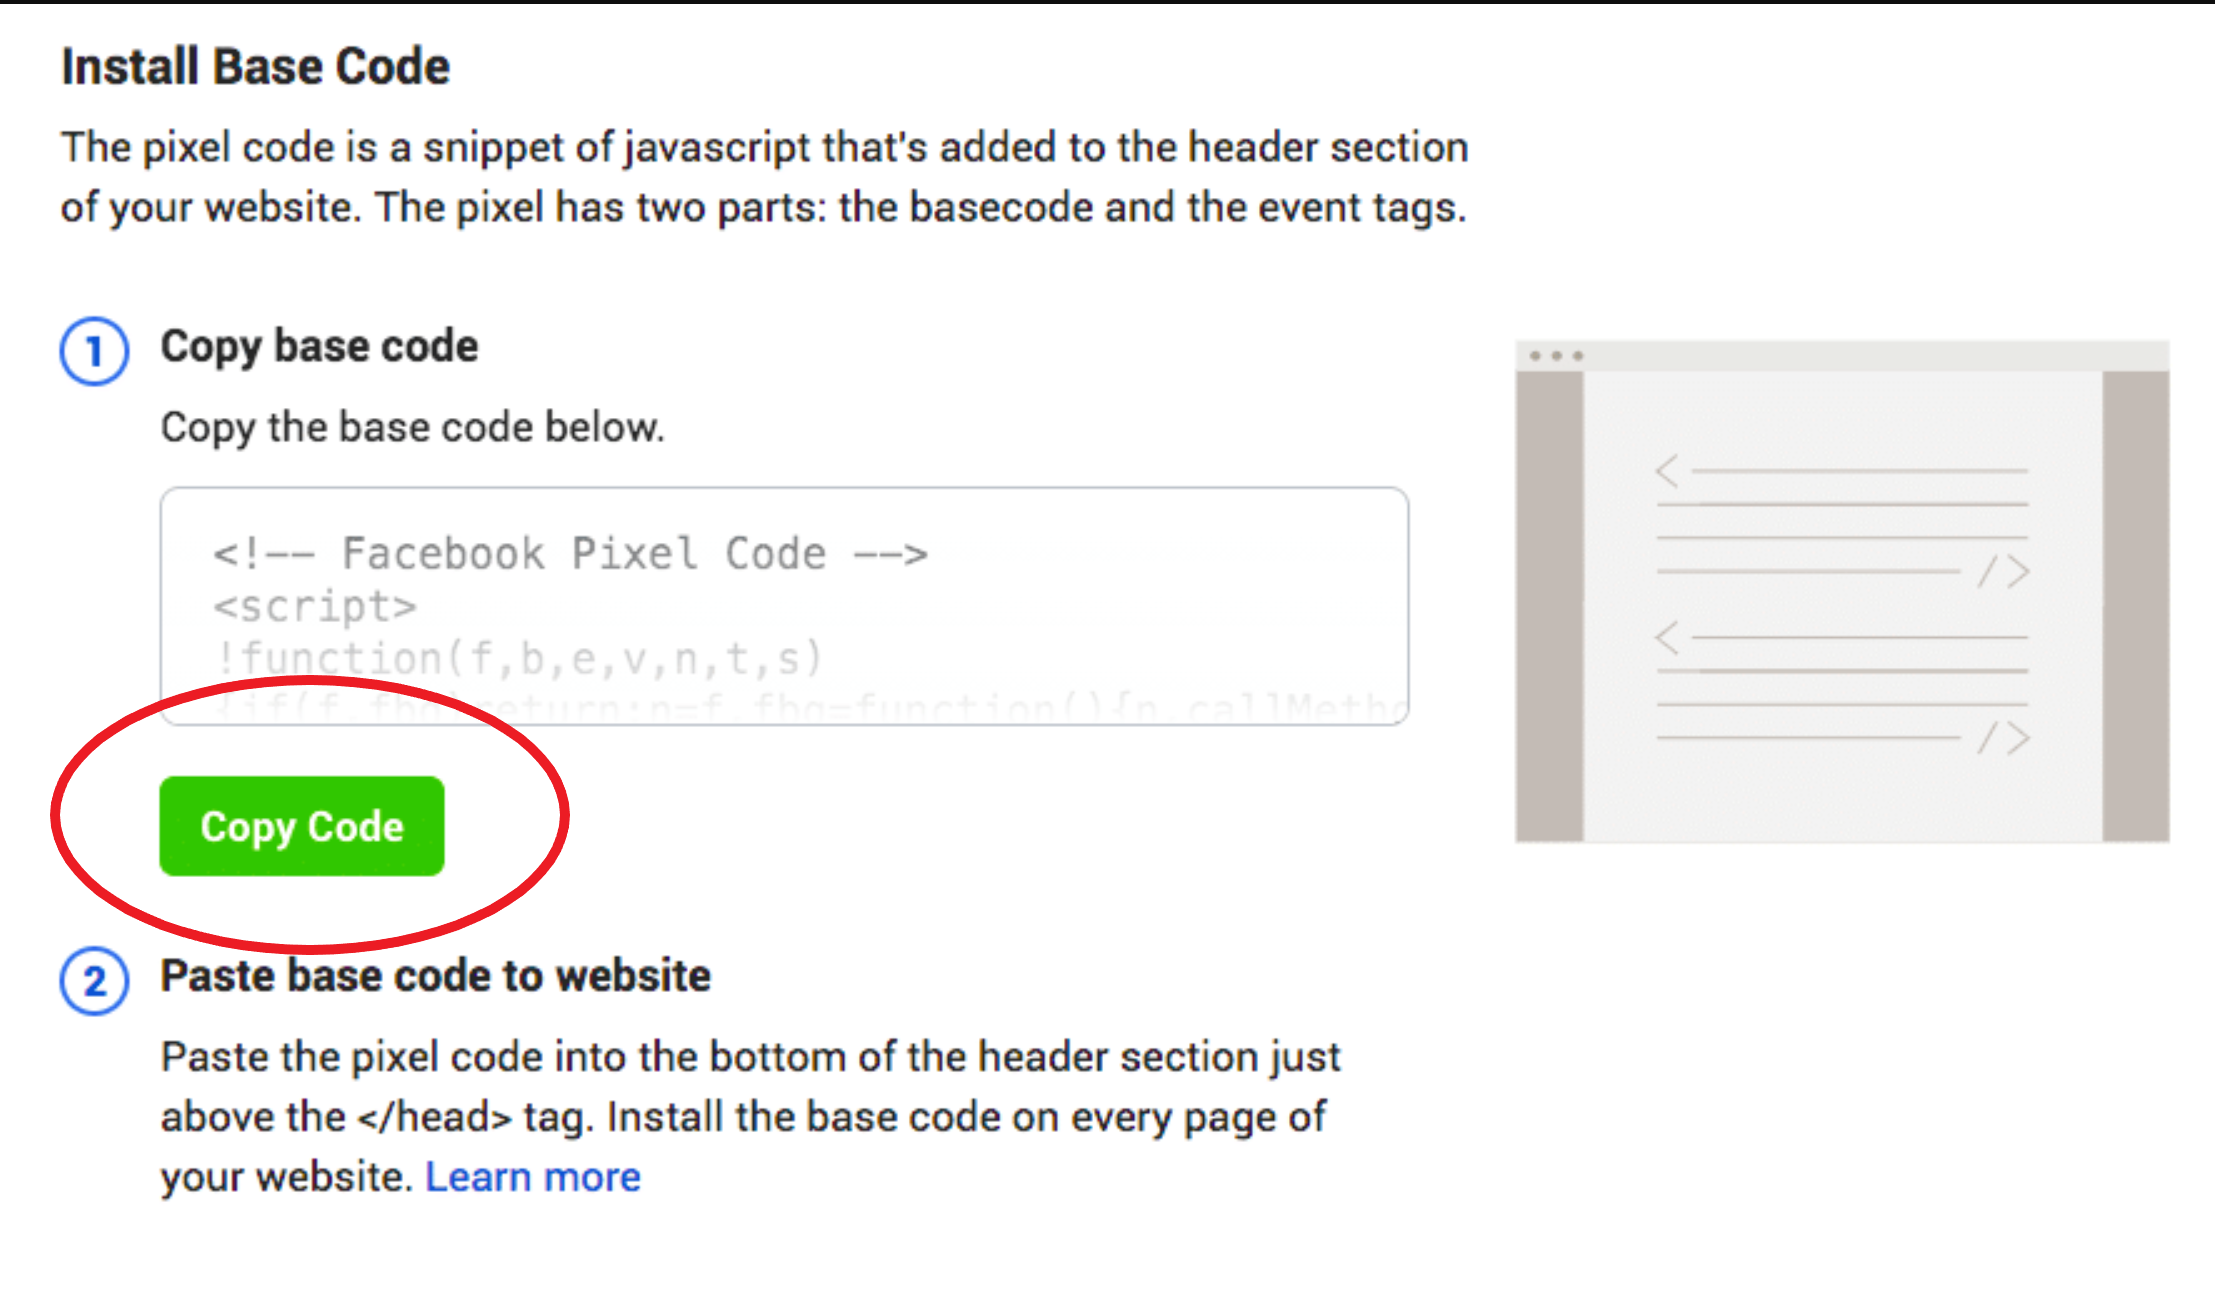
Click on the green button ‘copy code’
You need to paste this code into the header code of your website above the </head> tag.
Depending on how your website has been built you will need to do this on every page or into your header template.
Click continue.
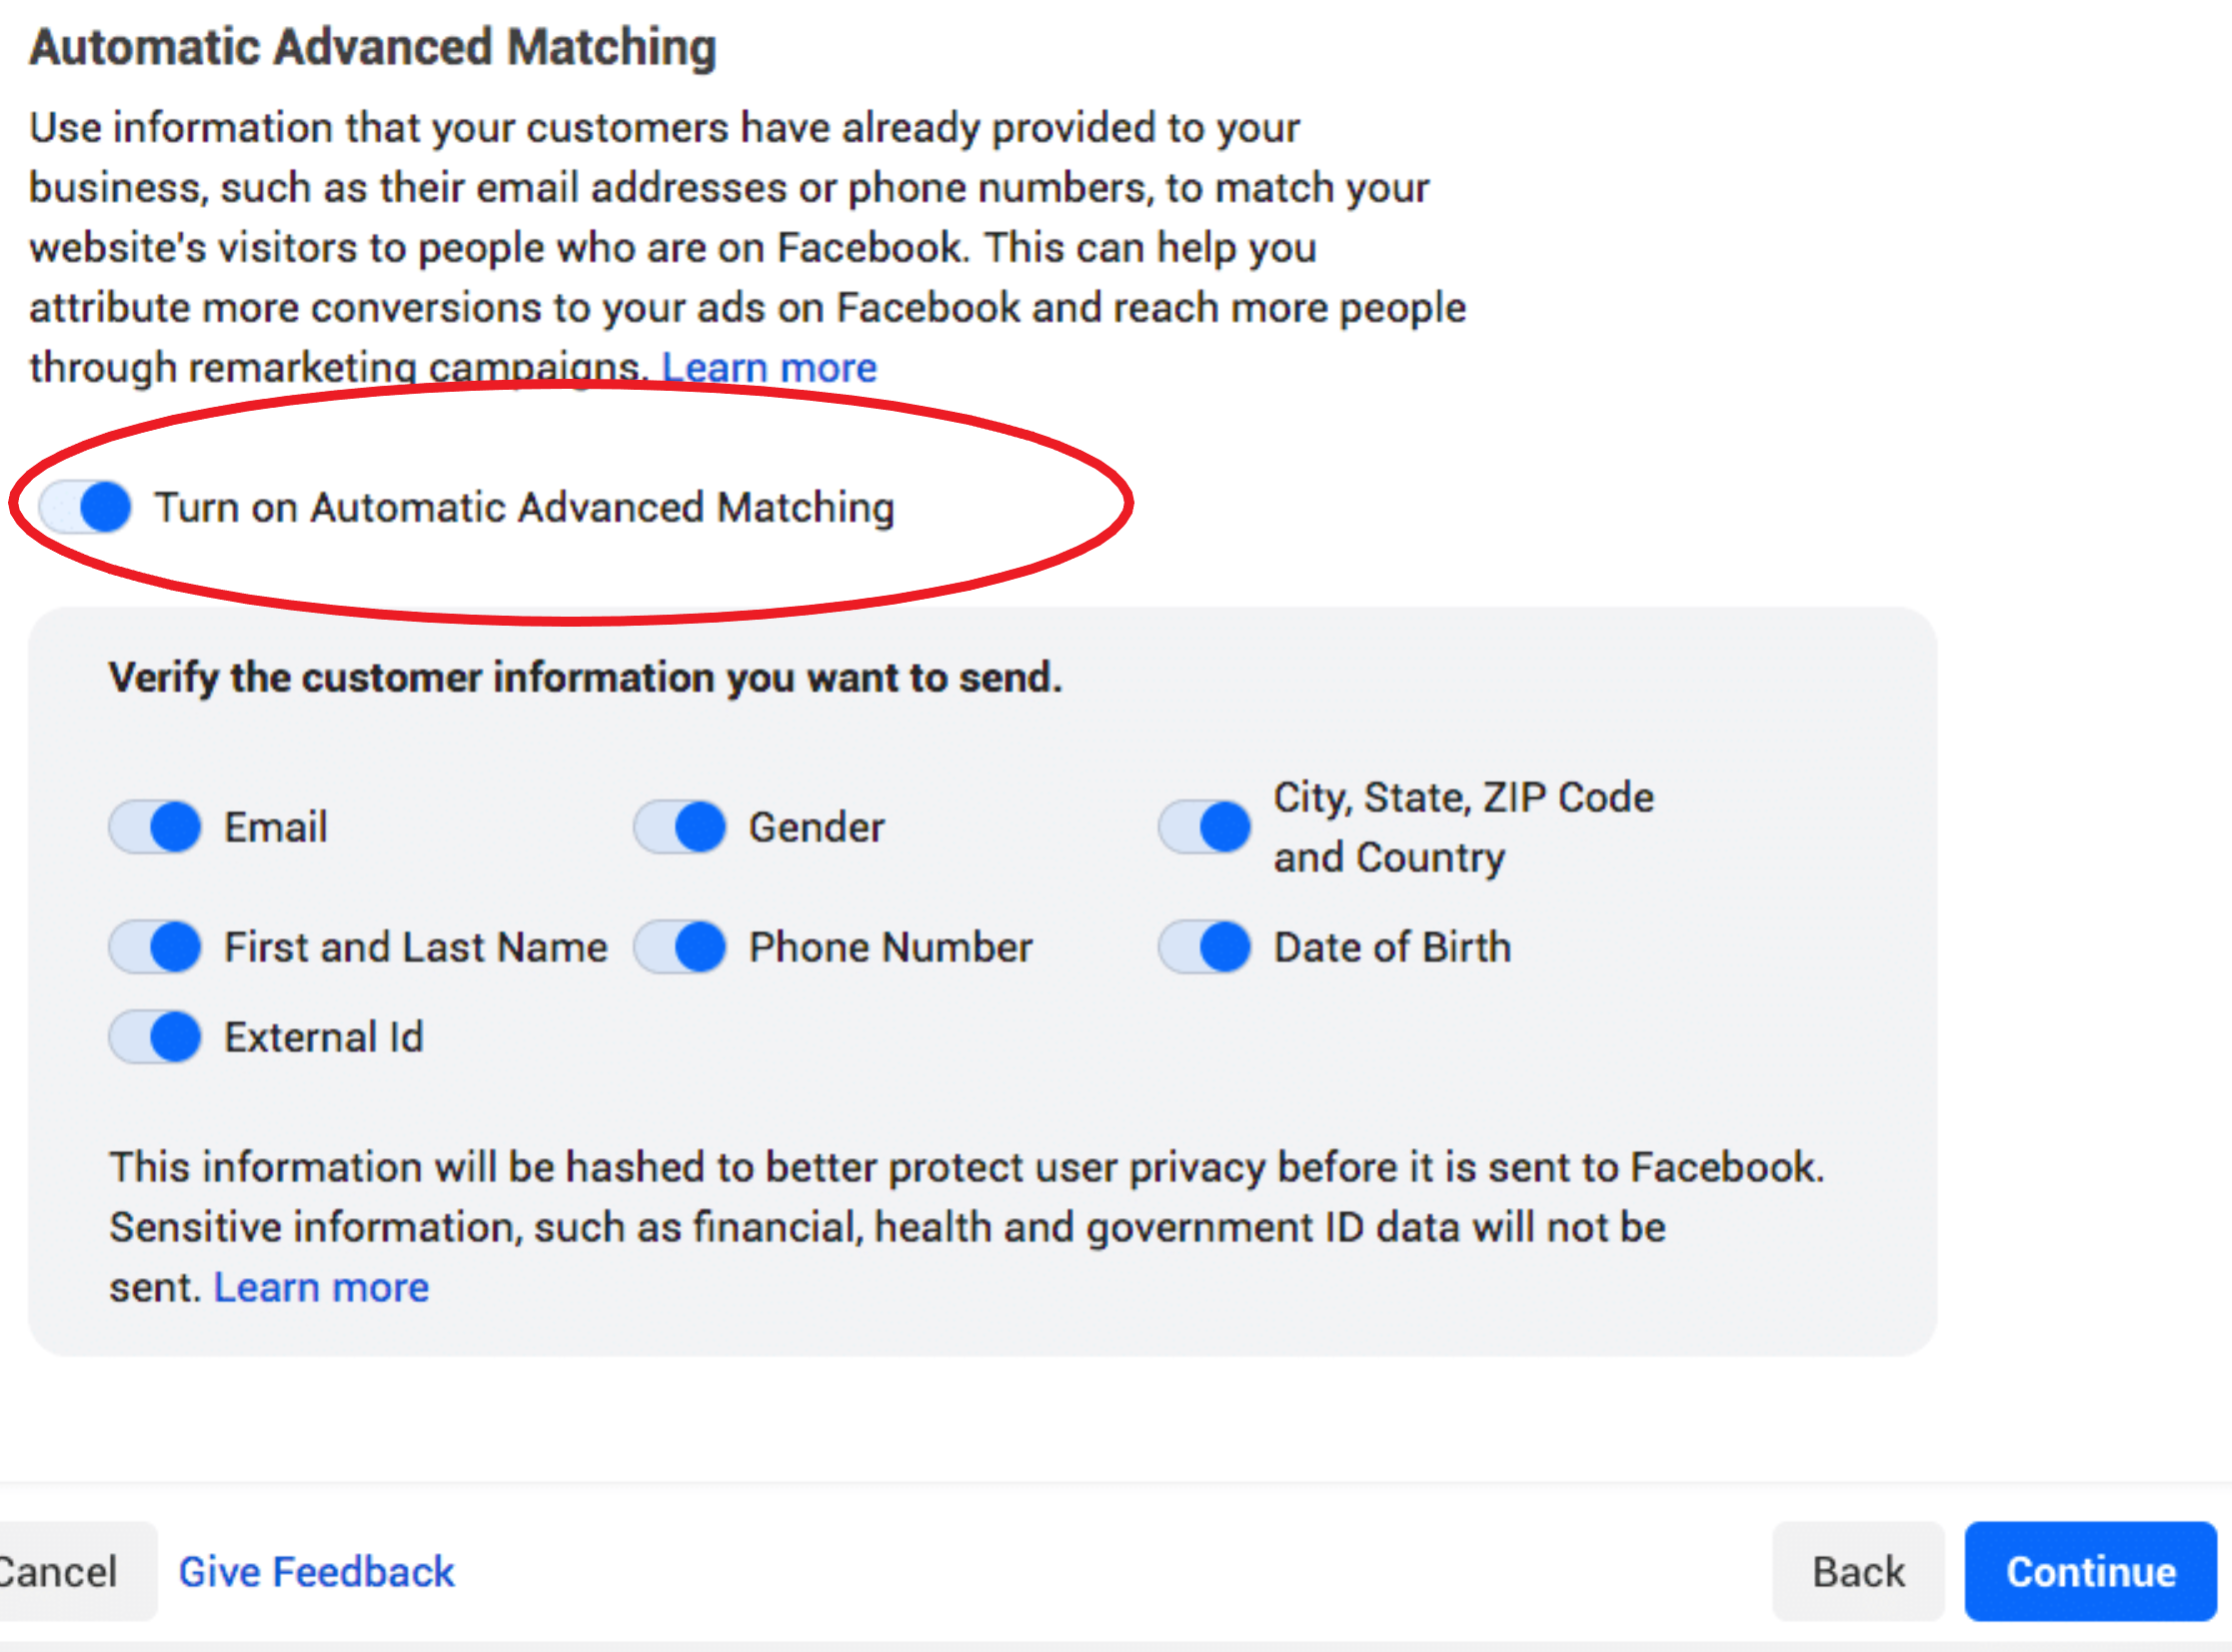
Next, you get the opportunity to choose automatic advanced matching, by having this on it lets you track more accurately.
Click continue
So now you have the Facebook pixel set up, and on your website, it’s time to add events, remember if you went via partners some events will already be installed.
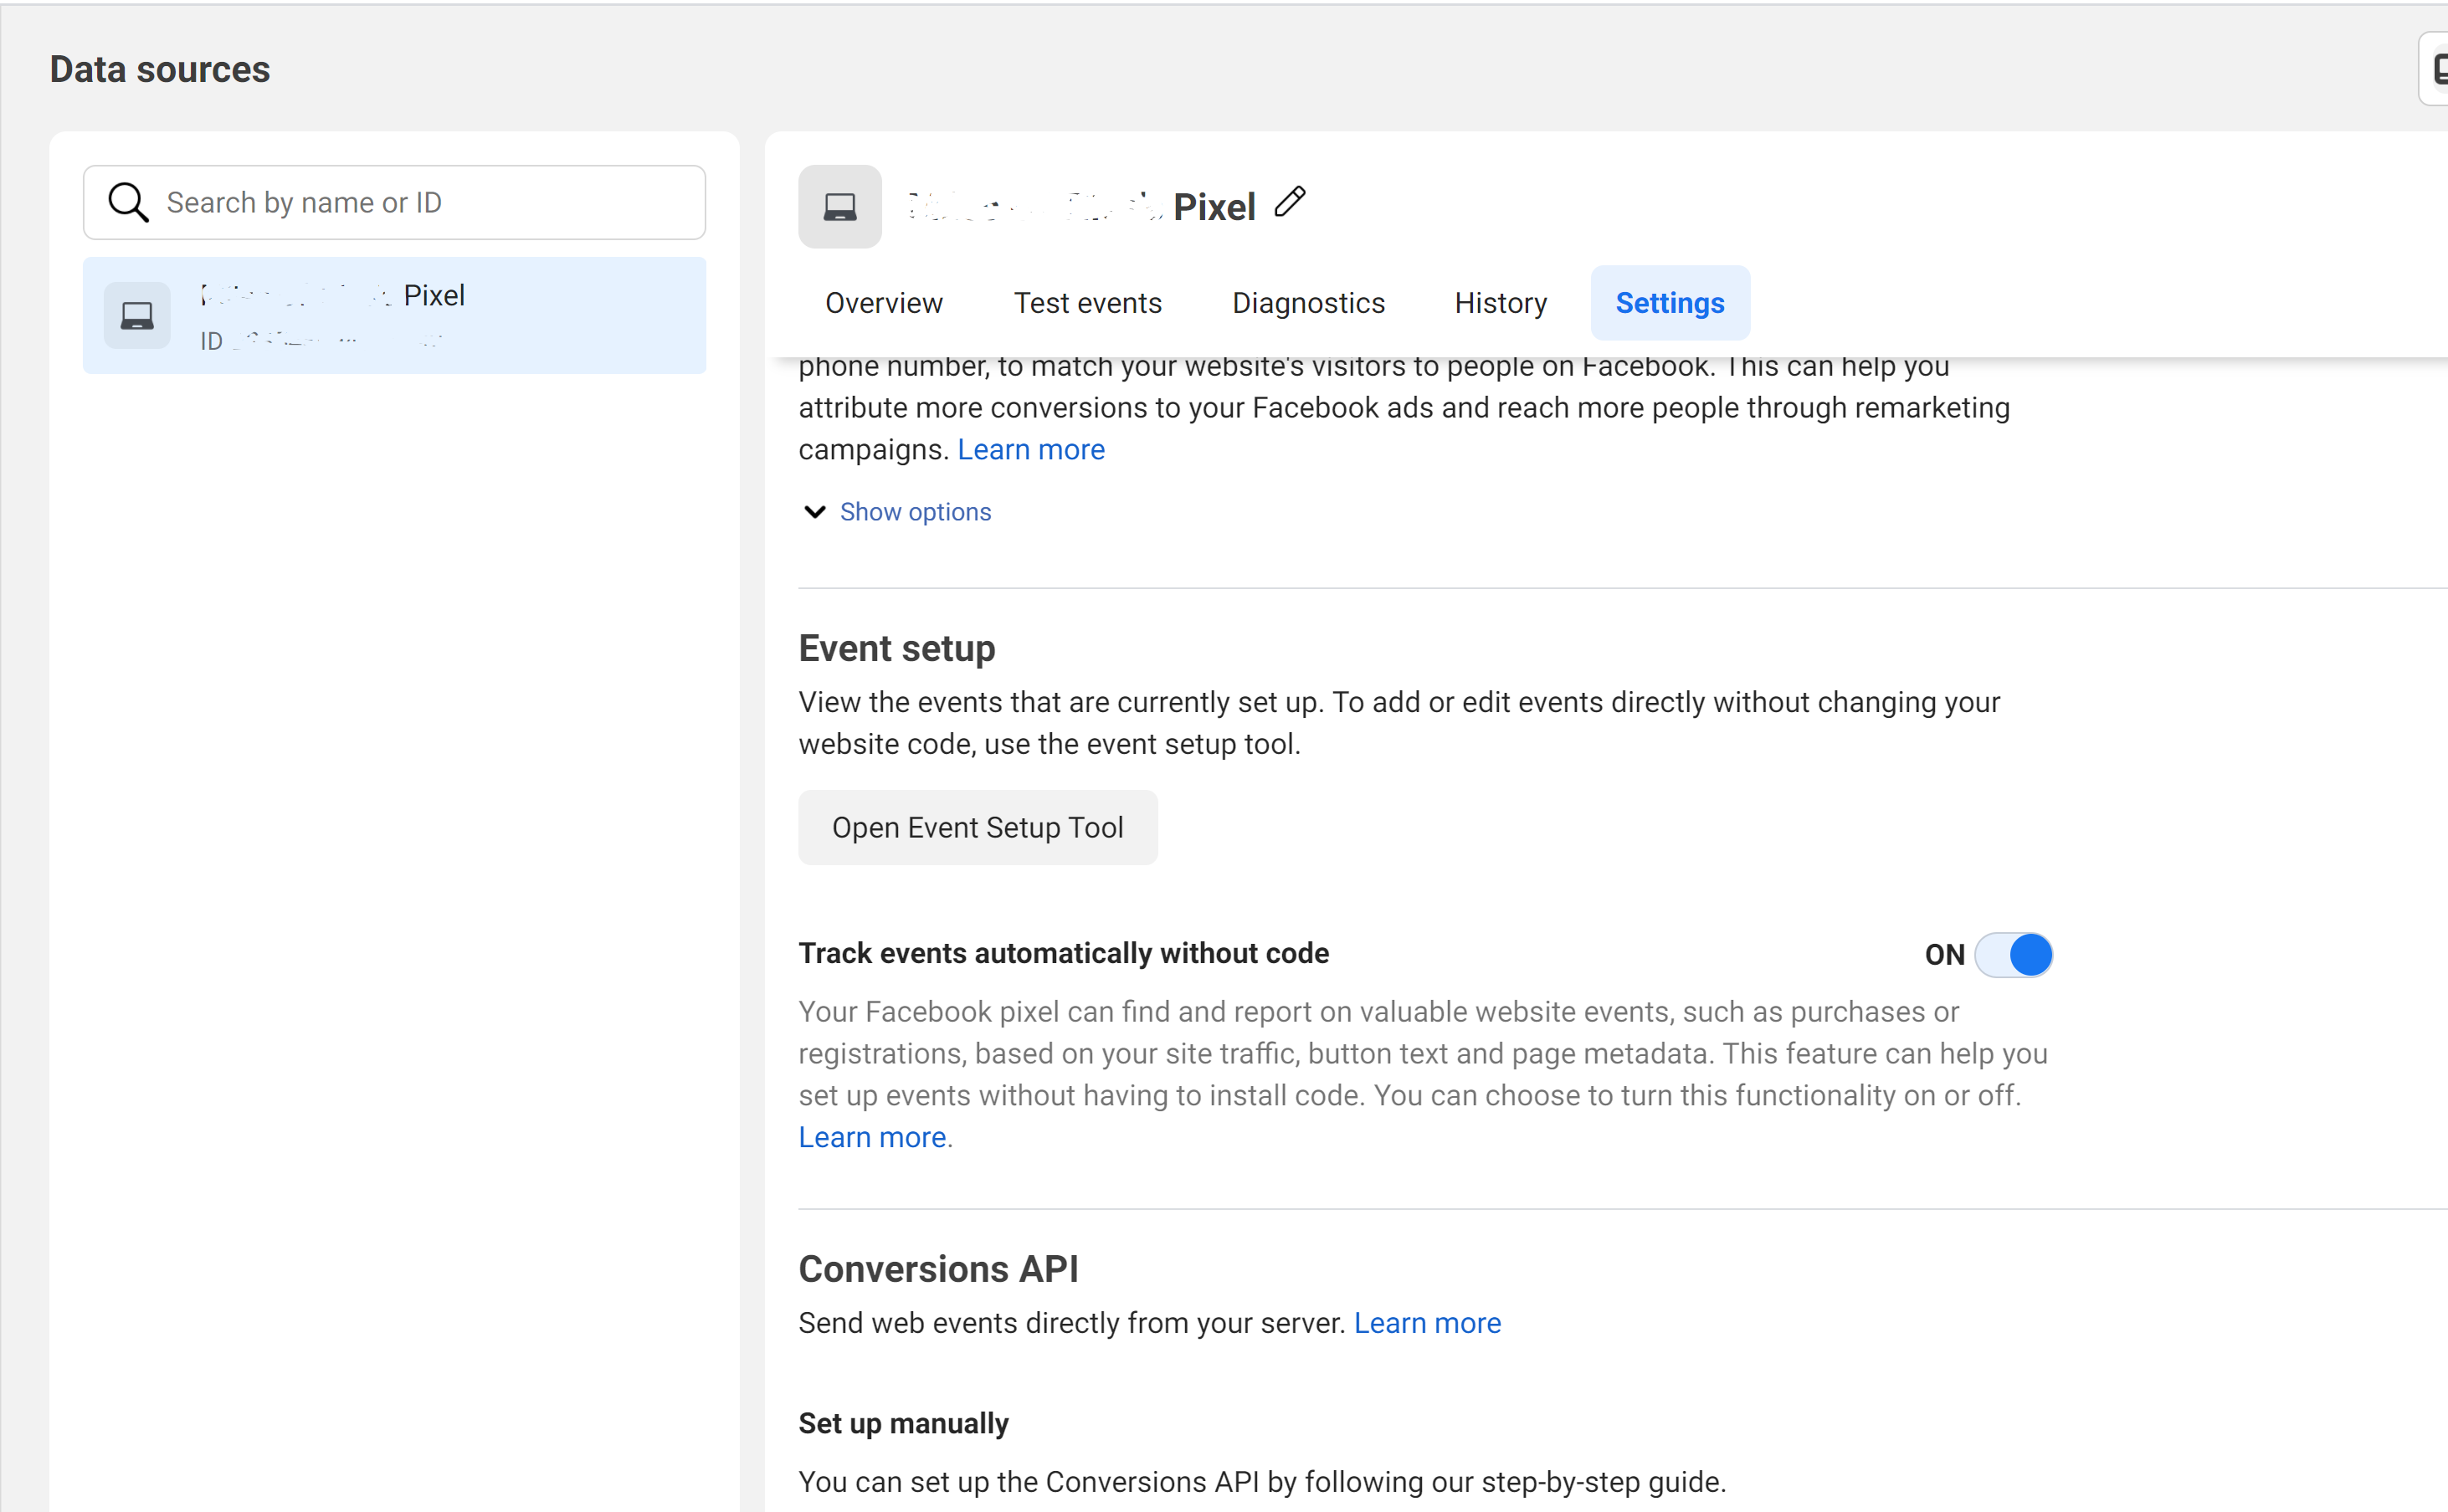
Go into your Events Manager as before.
Choose your Facebook pixel ID
Click Settings.
Scroll down until you find the Open Event Setup Tool.
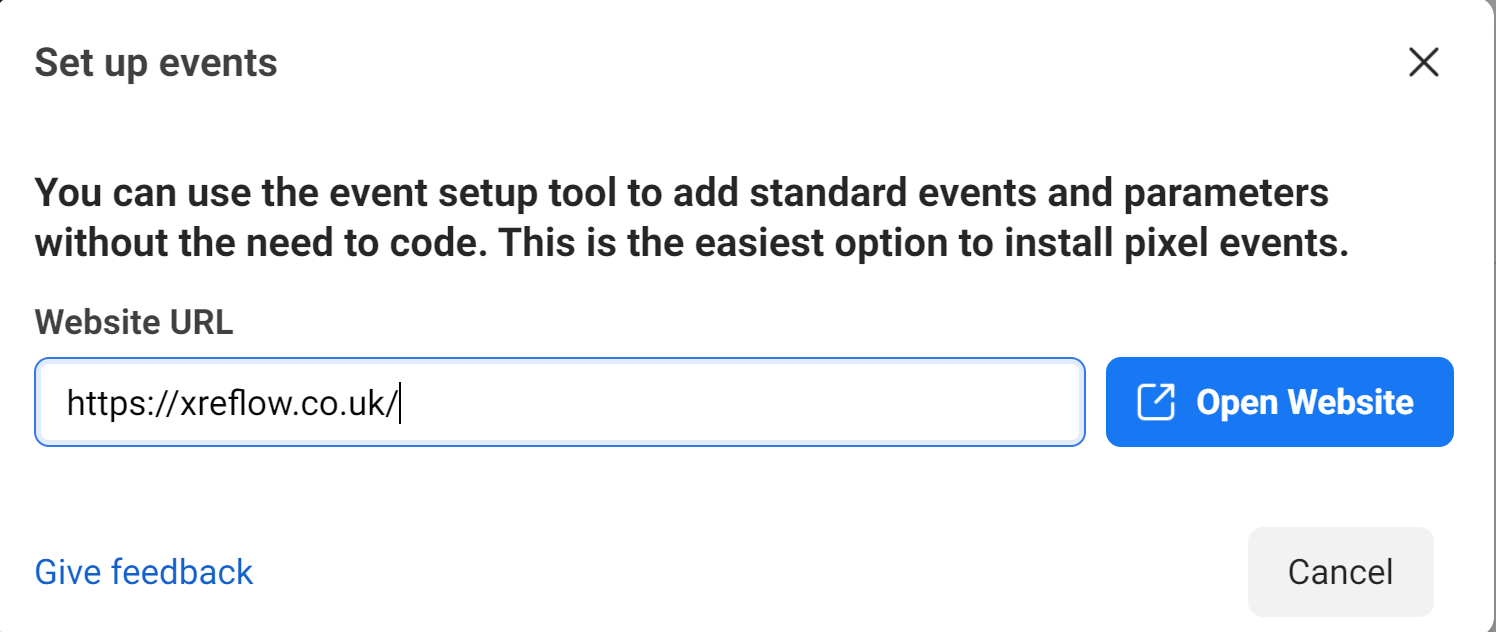
Put in your website URL
Click open website
You will be taken to your website
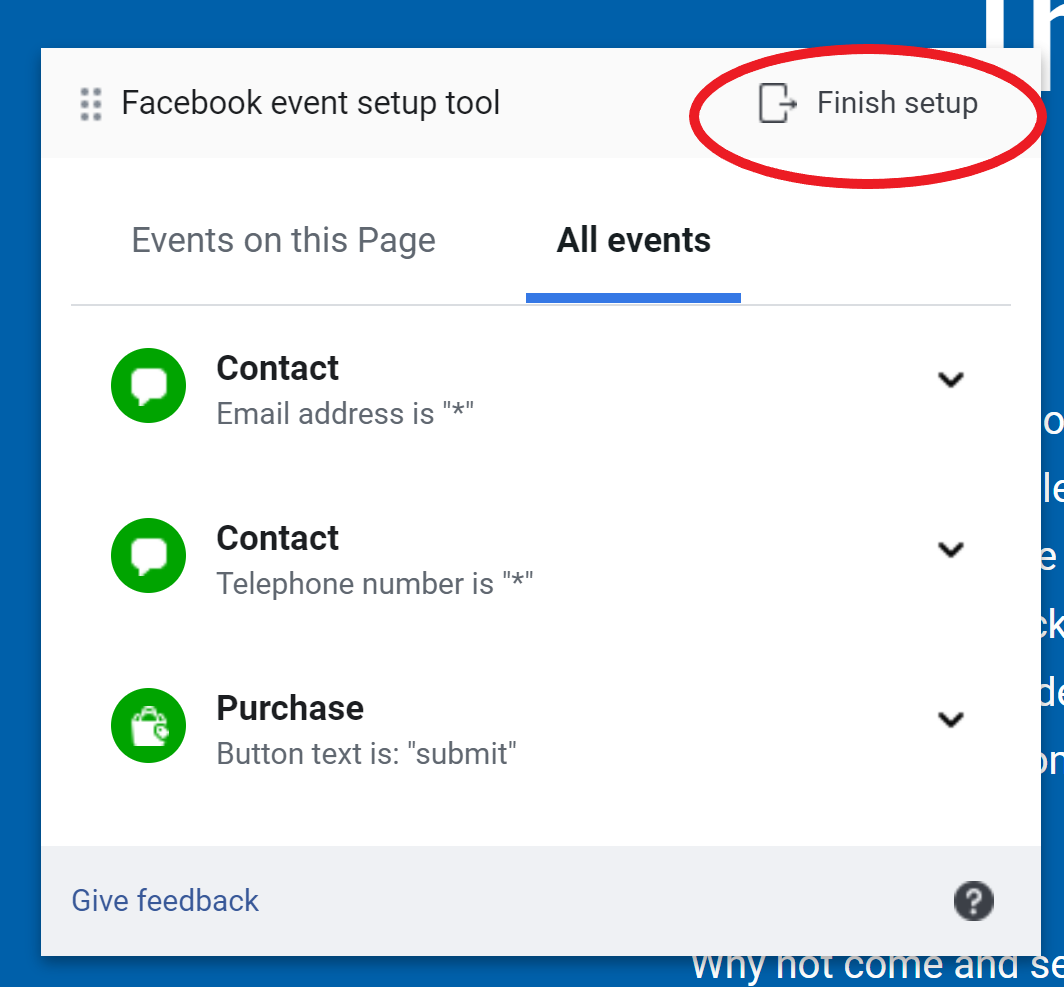
Facebook will provide you with a list of suggested events
Click review next to each listed event
You can decide if you want the event to run by either selecting Confirm or Dismiss
Click Finish Set-Up
Continue
Important To Remember
You need to make it clear to visitors that you are collecting their data, and allow them to opt-out if they wish to.
This means adding the information on your privacy policy on your website, and reading the following information from Facebook-
If you are looking to up your advertising game, and increase sales get in touch with XRF Digital today for one of the many helpful advertising packages we offer!